
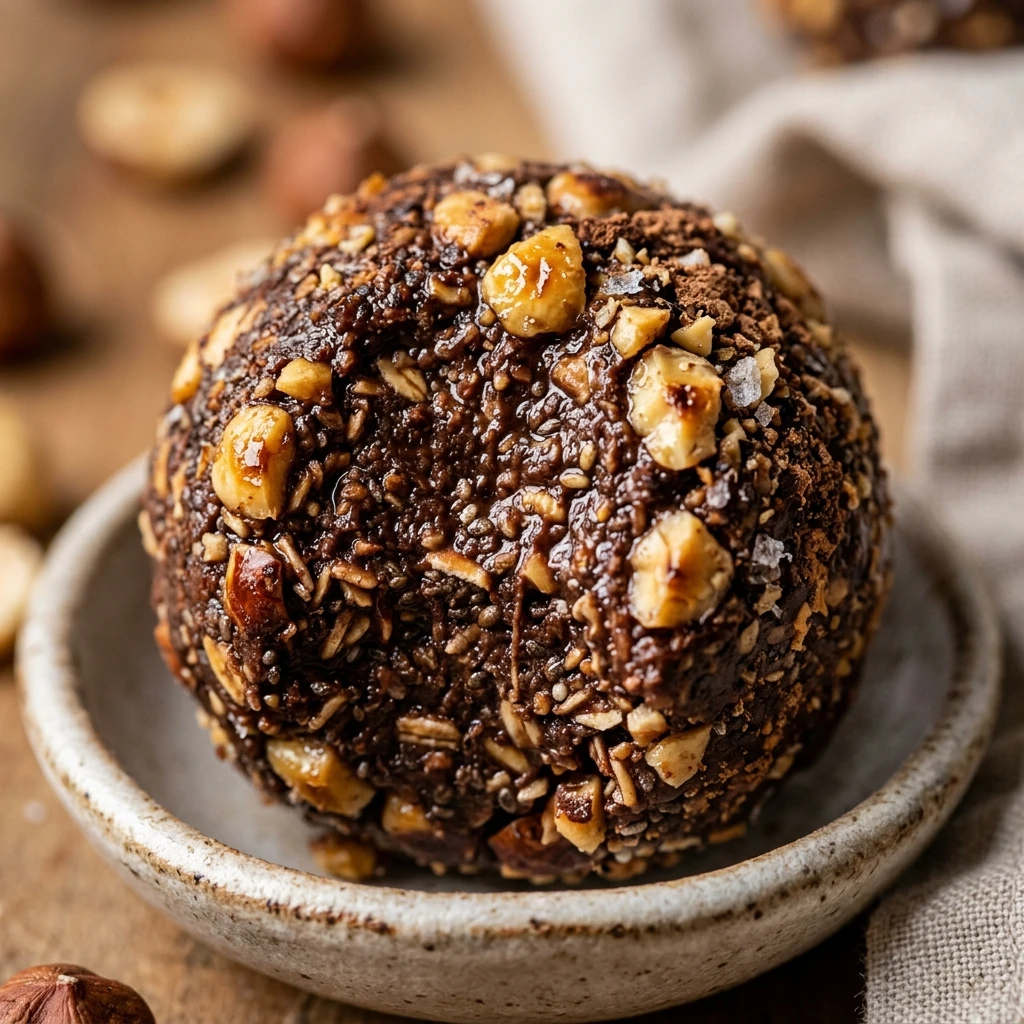

If you love the classic combination of rich chocolate and toasted hazelnuts, these Chocolate Hazelnut Protein Energy Balls are about to become your new favorite snack. They taste remarkably like a decadent truffle but are packed with wholesome ingredients that provide a steady stream of energy. Whether you need a quick pre-workout bite or a healthy treat to satisfy your sweet tooth after dinner, these bites are the perfect solution.
Making your own energy snacks at home is not only cost-effective but also allows you to control exactly what goes into them. These protein balls require no baking and come together in just a few minutes. They are naturally sweetened, high in fiber, and offer a satisfying crunch that makes them feel much more indulgent than your average protein bar.
Recipe Information
- Prep Time: 15 minutes
- Cook Time: 0 minutes
- Total Time: 15 minutes
- Servings: 12 balls
- Difficulty Level: Easy
Nutrition Information
- Calories per serving: 145 kcal
- Protein: 7g
- Carbohydrates: 14g
- Fat: 8g
- Fiber: 3g
- Sugar: 5g
- Sodium: 45mg
Why Make This Chocolate Hazelnut Protein Energy Balls
These energy balls are a fantastic alternative to store-bought snacks that are often loaded with refined sugars and preservatives. By using hazelnut butter and cocoa, you get that beloved “chocolate spread” flavor while fueling your body with healthy fats and quality protein. They are incredibly portable, making them ideal for busy mornings or long commutes.
Another reason to love this recipe is its versatility. You can easily adapt it to suit your dietary needs, whether you are vegan, gluten-free, or just looking to increase your protein intake. Plus, because they require no oven time, they are a great recipe to make during the hot summer months or when you are in a time crunch.
How to Make Chocolate Hazelnut Protein Energy Balls
Creating these delicious bites is a simple process of mixing, rolling, and chilling. Follow these easy steps to get the perfect texture every time.
Ingredients
- 1 cup rolled oats (certified gluten-free if necessary)
- 1/2 cup chocolate protein powder (whey or plant-based)
- 1/2 cup natural hazelnut butter
- 1/3 cup honey or pure maple syrup
- 1/4 cup roasted hazelnuts, finely chopped
- 2 tablespoons unsweetened cocoa powder
- 1 teaspoon vanilla extract
- 1/4 teaspoon sea salt
- 1-2 tablespoons water or almond milk (optional, if the mixture is too dry)
Directions
Step 1: Combine Dry Ingredients
In a large mixing bowl, whisk together the rolled oats, chocolate protein powder, cocoa powder, and sea salt. Ensure there are no large clumps of protein powder so the flavor is evenly distributed.
Step 2: Incorporate Wet Ingredients
Add the hazelnut butter, honey (or maple syrup), and vanilla extract to the dry mixture. Use a sturdy spatula or a wooden spoon to stir everything together. The mixture should be thick and slightly sticky.
Step 3: Fold in the Crunch
Gently fold in the chopped roasted hazelnuts. If the dough feels too crumbly and won’t hold its shape when pressed together, add water or almond milk one tablespoon at a time until the desired consistency is reached.
Step 4: Roll into Balls
Scoop about one tablespoon of the mixture at a time and roll it between your palms to form a smooth ball. You should end up with approximately 12 evenly sized energy balls.
Step 5: Chill and Set
Place the finished balls on a plate or baking sheet lined with parchment paper. Put them in the refrigerator for at least 30 minutes to firm up before eating. This helps the oats hydrate and improves the overall texture.
How to Serve Chocolate Hazelnut Protein Energy Balls
These protein balls are best served chilled directly from the fridge. For a more decorative touch, you can roll them in extra cocoa powder, shredded coconut, or crushed hazelnuts before chilling. They pair wonderfully with a hot cup of coffee or a cold glass of almond milk for a satisfying snack break.
How to Store Chocolate Hazelnut Protein Energy Balls
Store your energy balls in an airtight container in the refrigerator for up to two weeks. If you want to make a big batch for long-term meal prep, you can freeze them for up to three months. Simply thaw them in the fridge overnight or let them sit at room temperature for 10 minutes before enjoying.
Expert Tips for Perfect Chocolate Hazelnut Protein Energy Balls
For the best flavor, use roasted hazelnuts rather than raw ones; the roasting process brings out the oils and enhances the nutty aroma. If your hazelnut butter is very stiff (from the bottom of the jar), warm it slightly in the microwave for 10-15 seconds to make it easier to mix into the oats.
Delicious Variations
If you want to change things up, try adding a tablespoon of mini dark chocolate chips for extra indulgence. You can also swap the hazelnut butter for almond butter or cashew butter if you prefer a different nut profile. For a “mocha” version, add half a teaspoon of espresso powder to the dry ingredients.

Frequently Asked Questions
Q: Can I make these vegan?
Yes! Simply use maple syrup instead of honey and ensure your chocolate protein powder is plant-based.
Q: What if I don’t have hazelnut butter?
You can substitute with almond butter or peanut butter, though the flavor will change. To keep the hazelnut vibe, you could add a drop of hazelnut extract.
Q: Are these gluten-free?
These are gluten-free as long as you use certified gluten-free rolled oats and a gluten-free protein powder.
Q: My mixture is too sticky to roll. What should I do?
If the mixture is too sticky, add another tablespoon or two of oats or protein powder. You can also wet your hands slightly to prevent the dough from sticking to your palms.
Q: Can I use steel-cut oats instead of rolled oats?
No, steel-cut oats are too hard and won’t soften enough in this no-bake recipe. Quick oats can be used, but the texture will be softer and less chewy.
Conclusion
Chocolate Hazelnut Protein Energy Balls are the ultimate healthy snack for anyone who loves the taste of dessert but wants to stay on track with their wellness goals. They are simple to prepare, easy to customize, and provide the perfect balance of macronutrients to keep you feeling full and focused. Give this recipe a try this week and enjoy a little taste of indulgence in every bite!

Chocolate Hazelnut Protein Energy Balls

- Cook Time: 15 minutes
- Total Time: 15 minutes
- Diet: Gluten-Free, Vegan, Vegetarian
Ingredients
- 1 cup rolled oats (certified gluten-free if necessary)
- 1/2 cup chocolate protein powder (whey or plant-based)
- 1/2 cup natural hazelnut butter
- 1/3 cup honey or pure maple syrup
- 1/4 cup roasted hazelnuts, finely chopped
- 2 tablespoons unsweetened cocoa powder
- 1 teaspoon vanilla extract
- 1/4 teaspoon sea salt
- 1–2 tablespoons water or almond milk (optional, if the mixture is too dry)
Instructions
- In a large mixing bowl, whisk together the rolled oats, chocolate protein powder, cocoa powder, and sea salt. Ensure there are no large clumps of protein powder so the flavor is evenly distributed.
- Add the hazelnut butter, honey (or maple syrup), and vanilla extract to the dry mixture. Use a sturdy spatula or a wooden spoon to stir everything together. The mixture should be thick and slightly sticky.
- Gently fold in the chopped roasted hazelnuts. If the dough feels too crumbly and won’t hold its shape when pressed together, add water or almond milk one tablespoon at a time until the desired consistency is reached.
- Scoop about one tablespoon of the mixture at a time and roll it between your palms to form a smooth ball. You should end up with approximately 12 evenly sized energy balls.
- Place the finished balls on a plate or baking sheet lined with parchment paper. Put them in the refrigerator for at least 30 minutes to firm up before eating. This helps the oats hydrate and improves the overall texture.